Cheap Security Lab Training with Raspberry Pi 4, Docker & Kali Linux

The Raspberry Pi is a small yet power platform that is perfect for building a cost effective cybersecurity training lab. In this article we will look at installing Docker on a Raspberry Pi 4 (4GB) running Kali Linux (64 bit).

The case pictured is the Official Raspberry Pi 7″ touchscreen in a modified touchscreen case. It was made for the Pi 3, only slight modifications were made so the Pi 4 could fit in it. Modify cases at your own risk, you could cut yourself or destroy your case.

Installing Kali Linux on a Pi 4

This article assumes that you have already installed and updated Kali Linux on your Pi 4. If you have not, simply download the 64 bit Kali Linux 4 ARM image from Offensive Security.

Extract the image, write it to an MicroSD Card, insert it into your Pi4, attach peripherals, and power last of all. Allow the system to boot up completely.

Login with “kali/ kali” – Since Kali 2020, you no longer use “root/ toor” to log in. Reboot, Update and Upgrade, and reboot one last time. You are now ready to install Docker.

Installing Docker on Raspberry Pi

Full docs for installing Docker on the Pi are available on the Official Kali Website: https://www.kali.org/docs/containers/installing-docker-on-kali/

  • sudo apt update
  • sudo apt install -y docker.io
  • sudo systemctl enable docker –now
  • docker

You can add a user to the Docker group if you wish:

  • sudo usermod -aG docker username

You may need to start the Docker service manually

  • sudo service docker start

That’s it! You can now run Docker and install any Docker images that you want.

OWASP Juice Shop on the Raspberry Pi

Some Docker containers will not run on ARM, but you can find ports for some of the more popular ones. Just realize that some times these aren’t “Official” images, so proceed with due caution.

Also, the purposefully vulnerable Docker Images are just that, so follow all precautions necessary to protecting your systems while running them. The most preferred method is a stand alone local address only test LAN, disconnected or firewalled from both the internet and any production systems.

We will install the Docker “OWASP Juice Shop” image from the Docker library. This is an ARM port of the official OWASP Juice Shop program.

Tool website: https://hub.docker.com/r/santosomar/juice-shop-arm64

To install, and run, simply open a terminal and type:

  • docker run -d –name juice-shop -p 3000:3000 santosomar/juice-shop-arm64

Docker will pull down the image, and run it.

Once it is installed:

  • Open a browser and navigate to localhost:3000 or IP_Address:3000

You are now good to go! You can begin testing your skills locally on the Pi or you can use a LAN system to practice your skills. A full write up on “Pwning OWASP Juice Shop” can be found here:

https://bkimminich.gitbooks.io/pwning-owasp-juice-shop/

and a list of Solutions can be found here:

https://bkimminich.gitbooks.io/pwning-owasp-juice-shop/content/appendix/solutions.html

A list of challenges for Juice Shop is available. As you complete each challenge, the website keeps track of your pwning progress. Here is one of my favorites, the “Melee Kitty”!

Enjoy and most importantly, have fun!

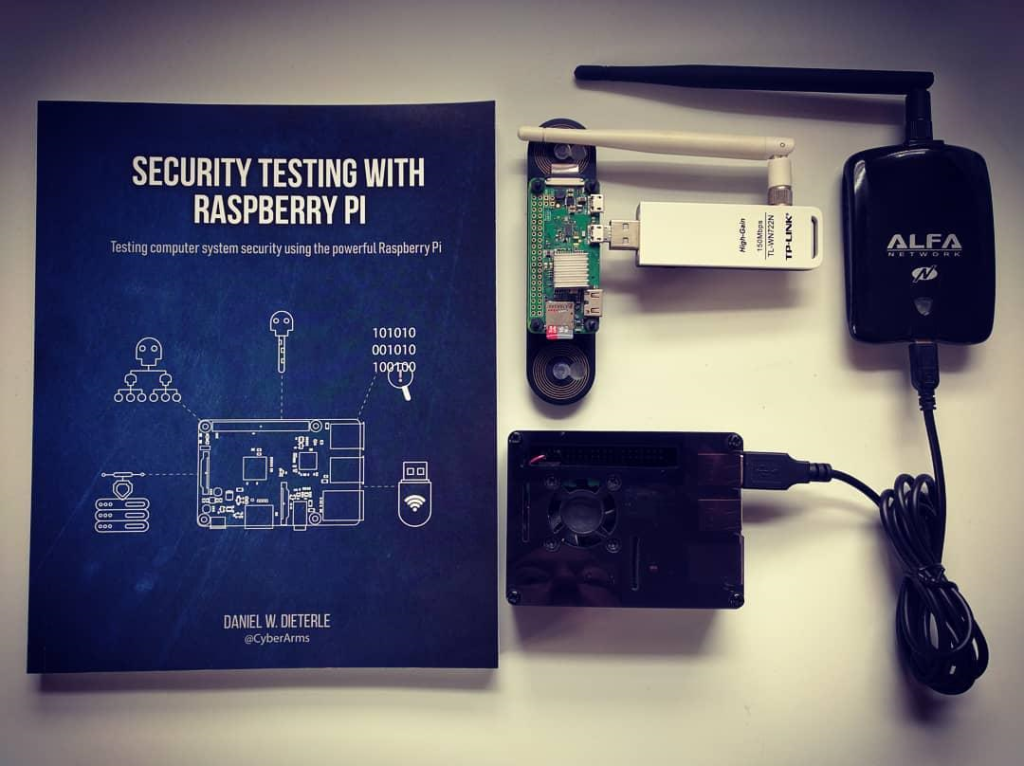
If you would like to learn a lot more about using Raspberry Pis in the security field, check out my latest book, “Security Testing with Raspberry Pi“!

Pwnagotchi on a Pi 4 using any Display

I love Pwnagotchis, I mean, who doesn’t, have you seen these things?? My problem, is that I could not get great reception using the Pi0W built in WiFi. Also, I did not have a compatible E-Ink display for it. My first goal was to see if I could get Pwnagotchi running on a Pi 4 with an Alfa AWUS036NHA Long Range WiFi adapter. My second was to get it to display on an unsupported touchscreen or a full-size monitor.

TLDR version – You can!

But first – a Disclaimer:

These are just some personal notes of mine on getting the wickedly cool “Pwnagotchi” to work on a Pi 4 with a long range WiFi adapter. Also, how to access the Web User Interface so you don’t need an “E-Ink” display. This is mostly my work notes that I am sharing – It is a “try at your own risk” project. Due to configuration and network differences, it may or may not work for you and could leave your Pi software in an unstable state.

That being said, I will not be offering any technical support on it. These are just steps that worked for me, that I found through much trial and error. Lastly, never try to gain access to a network that you do not have permission to access – doing so is illegal and you could go to jail.

Pwnagotchis are the ridiculously cute (and intelligent) Pi0w based WiFi attack tool made by the author of Bettercap. I recently wrote a magazine article for Hakin9 on using the Bettercap Web UI and Pwnagotchis. The Web UI is an HTML interface to Bettercap, it allows you to control it through a browser.

Raspberry Pi 4s’ are the latest and greatest flag ship of the Raspberry Pi family. They have increased power and speed. They also come with different memory options; I love the 4GB model! The only catch is they draw more power than the model 3, and changed the power plug type, so you will most likely need a new power supply, or a very strong battery.

Again, this is just some notes that helped me get this working, use at your own risk. Enough intro, let’s get to this! First up, running Pwnagotchi on a Pi4.

Installing Pwnagotchi on a Pi4

Tool website: https://pwnagotchi.ai/
Tool Github: https://github.com/evilsocket/pwnagotchi
Tool Authors: Evilsocket and the Pwnagotchi team

The Pwnagothi wiki covers everything you need to know about installing, configuring and using the tool in a normal atmosphere. You should read the entire Wiki.

  1. Download and install the Pwnagotchi Raspberry Pi lite image: https://github.com/evilsocket/pwnagotchi/releases
  2. Write the image to an SD card.
  3. Insert the SD card into your Pi4, attach peripheral devices and lastly power.
  4. Connect a LAN cable – when the ethernet cable is plugged in, it starts the Pwnagotchi in manual mode, and you can SSH into the Pi if you want to.

With the current version of Pwnagotchi (1.4.1) it seems to boot up fine on a Pi4, but doesn’t run. It doesn’t seem to like the default waveshare display type -if you don’t have one, that is – changing this to “inkyphat” seems to do the trick.

  • Change the default e-ink device in config.yaml:
  • sudo nano /etc/pwnagotchi/config.yml
  • add the following:

ui:
display:
     type: ‘inkyphat’
     color: ‘black’

Next, I wanted to use an external USB WiFi adapter instead of the built in one. Instead of modifying a bunch of config files in Pwnagotchi, the simplest way seemed to be to just turn off the onboard wireless, so the USB WiFi becomes “wlan0”

6. In /boot/config.txt, add the following line to turn off the onboard WiFi:

dtoverlay=disable-wifi

7. Reboot

In a web browser, navigate to the IP address of your device and port 8080 to view the Web UI.

So, in my case, it would be 172.24.1.157:8080

The webpage should show the iconic Pwnagotchi face with control options. You now have a Pi4 Pwnagotchi that uses the Web UI!

Full Screen Display on any Screen

That is all well and good, but how can you run Pwnagotchi on a display that isn’t directly supported? I spent several days trying to get my Raspberry Pi 7” touchscreen to work with Pwnagotchi and did find a way to make it work. It’s more of a trick than anything, it is just running the Web UI in a full screen browser!

Again, proceed at your own risk, and I am not offering any technical support on how to do this – it took a lot of futzing to get this to work on mine, and it may not work on yours, or it may leave your Pi in an unstable software state. But I found if you install the Pwnagotchi Raspbian Lite image on a Pi 4, get it working with the modifications mentioned above, all you need to do next is install the Raspbian Graphical User interface and Chromium, and you can view Pwnagotchi locally on any display!

Quick instructions:

You won’t be able to get out to the internet, because Pwnagotchi changes the default Route, so we need to delete the default route, then add a new route to your gateway/ router. You can then pull down the files needed with “apt install”.

  • sudo ip route del default
  • sudo route add default gw 172.24.1.1 eth0 (Use your gateway address!)
  • sudo apt install raspberrypi-ui-mods
  • sudo apt install chromium-browser
  • reboot – the default route should restore on bootup

The first two commands deal with the routing. The third command installs a cut down version of the Raspbian graphical desktop. Next, the chromium web browser is installed.

Once it reboots, start Chromium, navigate to the Pwnagotchi web interface and press “F11” for full screen. That’s it! If all went well, you should have a large Pwnagotchi on the screen!

Now remember, it is a web interface, so, if you want you can also surf to it from your desktop or mobile systems connected to the same LAN.

This was just a quick overview of running Pwnagotchi on a Raspberry Pi 4. Do you want to unlock the real power of Pi for Ethical Hacking? Check out my latest book, “Security Testing with Raspberry Pi” – available on Amazon.com!

Pi 4 Hacking Platform using DietPi and PTF

Building a Raspberry Pi 4 Ethical Hacking platform using The Pentesters Framework and DietPi.

I’ve been playing with using different hacking tools and Operating Systems with the Pi 4. In this article I cover installing The Pentesters Framework on a RPi 4 running DietPi.

DietPi is a very lightweight Debian OS for the Raspberry Pi. The Pentesters Framework by TrustedSec is an Ethical Hacking installation script that automatically installs and updates over 250 modules/ tools. It would be great if they would work together on a Raspberry Pi 4. The good news is that is does – With a couple tweaks.

I cover installing and using The Pentesters Framework on Raspberry Pi in my latest book. So, I am not going to go into great detail on using the tools in PTF. I just want to cover actually installing it on DietPi.

Installing

NOTE: You will need a Raspberry Pi 4, and at the minimum a 32 GB MicroSD card if you want to install all of the PTF tools. Don’t have a Pi 4? Seeed is currently offering free shipping for orders over $119 with a Raspberry Pi 4 4GB.

Insert the MicroSD card into your Pi, attach peripherals and lastly connect power (always connect power last). When DietPi boots up you will be presented with some options.

  • Pick any software install options you want, then “Go install software”
  • Requested software and updates will be installed
  • Reboot when finished

I just run through it quickly the first time to get the latest OS updates. Note the CPU temp warning, it’s a Pi 4, it runs hotter than a Pi 3.

To install an “X” Desktop or any other included software, type, “dietpi-software”.

There are a ton of add-on software options under “Software Optimised”. For example, if you want a graphical desktop, pick the X-Desktop you want and then the “Go install software” option. You can also setup your login preferences from this menu – auto login, desktop login, etc.

All we really need here is to install Python. Then we need to make a small config file tweak and finally install PTF.

Installing Python

From the DietPi-Software menu, go to “Software Additional” and install Python:

  • Cursor down to Python Pip, hit the space bar to select it.
  • Select “OK

You will return to the main menu.,

  • Cursor down and select “Go >> Start Installation
  • Reboot when finished

We need to install git:

  • Open a terminal and enter, “apt install git

Next we need to comment out a line in the ‘/etc/hosts’ file or the PTF install will error out.

  • Comment out the “::1 localhost  IPv6 localhost” line
  • Reboot

That’s it! We can now proceed with the standard PTF install:

You will then see the main PTF interface:

Type “show modules” to see all available modules. You can install individual ones if you wish. If you have a large memory card (32 Gb), you can install all of them.

  • To install all tools, enter “use modules/install_update_all
  • Reboot when finished

The install will take a very long time, especially if you install all of the modules. After install, all tools will be located in category themed directories under the ‘/pentest’ directory, as seen below:

Many of the tools can be run from anywhere, but some tools require you to change into its install directory for it to work properly. This is usually ‘/pentest’, but some run from ‘/usr/share’ as well. Check it out, there are a ton of very good tools at your disposal, like “Sniper”:

And there you have it. Again, I go into much deeper detail in my book about using PTF on a Pi, I just wanted to show how it could be installed on DietPi. If you want to learn a lot more about using Raspberry Pi for Ethical hacking check out my latest book – Security Testing with Raspberry Pi

New Book: “Security Testing with Raspberry Pi”

My latest book, “Security Testing with Raspberry Pi” is out. The newest in my “Security Testing” series is all about the versatile Raspberry Pi! †

The credit card sized Raspberry Pi has been a hit with makers for years, it is amazing how many different ways you can use these devices. What many don’t know is that they are also a great tool for use in the security field.

The RPi can run many of the popular Ethical Hacking tools and operating systems. The small size and portability of the Pi makes it a perfect tool for Red Teams and Pentesters.

For example, the RPi makes for great pentesting “Drop Boxes”, small scanning remote access tools left behind on a client’s website during a test. But that is just one use, thanks to P4wnP1, the Pi can also be used as a very powerful and live customizable HiD attack tool. They can even be used as surveillance cameras.

In my book, I cover how to install and use many of the top security tools on the Raspberry Pi.

How to install Kali Linux on a RPi, installing security tools on Raspbian, how to use Warberry Pi – a drop box like system, even how to setup your Pi to act like a security camera, and much, much more!

Like my previous books, the first thing covered is setting up a test lab with vulnerable targets. You will see how to use the RPi to scan test systems for vulnerabilities. I also cover how to use the RPi as an actual test target so you hone your ethical hacking skills without breaking the bank.

This book basically takes off where “Basic Security Testing with Kali Linux” ends and shows you how to use a Pi as a functional security tool. Though not a beginner, “How to use a Pi” book, I use step-by-step tutorials for those new to ethical hacking and the Raspberry Pi.

What about the Raspberry Pi 4? The book now includes notes for those who want to use the brand new Pi 4. As the Pi 4 was just released, many of the operating systems and tools are not 100% functional yet with the Pi 4. But you can install Kali Linux on the Pi 4, and use many of the popular security tools in Raspbian. Functionality will increase as time goes on and as tools are updated to work with the Pi 4.

If you are interested in the Raspberry Pi and want to see how to use it in the security realm, check out, “Security Testing with Raspberry Pi“!