In our last article we saw how to install Kali Linux on a Raspberry Pi and connect to it remotely from a Windows system. This time we will look at how to run some basic pentesting tools including Wi-Fi monitoring.
Once your Kali is up and running you can enter “startx” or run commands from the terminal prompt. If you are using Kali remotely, you will mostly be running commands from the command prompt.
For example, here we ran a simple nmap scan:
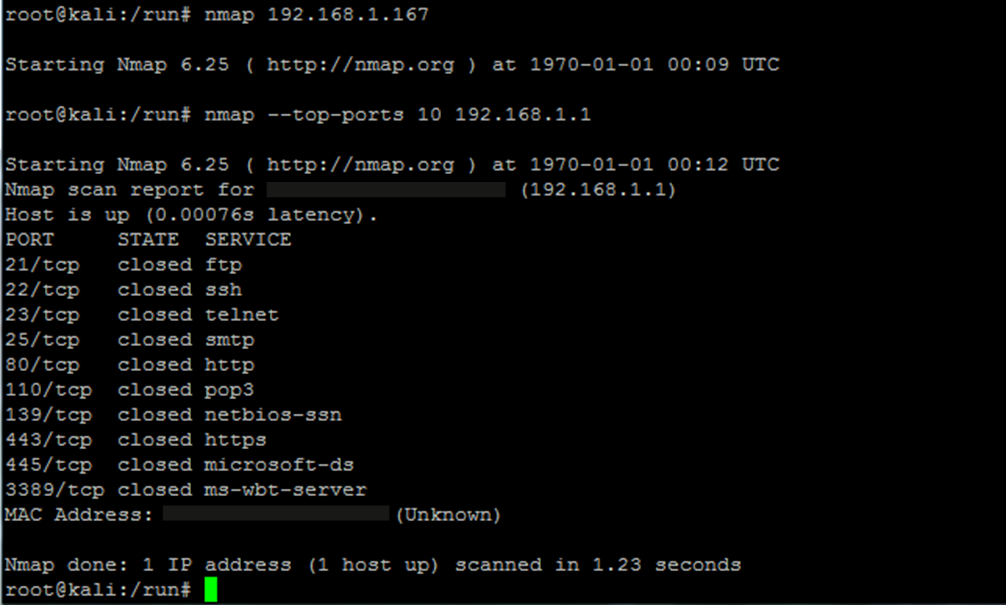
Most of the commands that run in regular Kali Linux have no problems running on the Raspberry Pi. But I did run into some snags.
For Example, I tried running Metasploit on mine, but gave up after it seemed to take forever to come up. I also tried running the Social Engineering Toolkit (se-toolkit from command prompt). Even parts of this gave random errors, thought it did look very cool:

Wireless Penetration testing with the Kali on PI worked very well, and was a lot of fun.
Just Plug your USB Wi-Fi adapter into the PI.
I used a TP-Link TL-WN722N.
At the command prompt type “ifconfig” and check to see if your Wi-Fi adapter is listed. It should show up as wlan0. If you don’t see it, type “ifconfig wlan0 up“. Then run “ifconfig” again and it should show up:

Next let’s see what networks our wireless card can see.
Type, “iwlist wlan0 scanning“:

Very cool, it is working. Now let’s run some of the basic Aircrack-NG tools.
First we need to put our wireless adapter into monitoring mode.
Type “airmon-ng wlan0 start“:

This creates a new wireless adapter called mon0. Now we can use this interface to capture wireless management and control frames.
Normally you would just run Wireshark and tell it to capture packets from the mon0 interface. Well, I was remotely logged into Kali and couldn’t run Wireshark through Putty as it is a graphical program.
So I just used tcpdump instead.
Simply type tcpdump -i mon0:

This will display all the management and control communication for all wireless networks within the reach of your Wi-Fi adapter.
So with just a few short commands, we were able to perform basic Wi-Fi monitoring with Kali Linux on a Raspberry Pi.
How cool is that?
This is just a basic look at using the aircrack-NG tools on Kali.
For more information check out “Hacking Wi-Fi Networks with Fern, Kali and a Raspberry Pi“
Want to learn a lot more about Wireless Penetration testing? Check out the Backtrack 5 Wireless Penetration Testing book by Vivek Ramachandran.

Did you have any issues seeing packets with your TL-WN722N? I am using the same adapter and everything looks identical until I run tcpdump -i mon0. Tried airodump-ng as well. Neither sees any packets. Just wondering what I am missing.
Never mind, it is working now. Thanks for the great write up.
Thanks! I am glad you liked it!
Hopefully have some more tutorials up on it soon. 🙂
Really nice article thanks
Thanks Joel, appreciate it!
I went and bought the same adaptor, but I can’t seem to get it to initialise properly. It never shows up in ifconfig even after trying to get it ‘up’. It recognises its there, but always reports when trying ifconfig wlan0 up that it failed to ‘wake up’ among other assorted errors along those lines. If my adaptor dud or am I missing something?
Wow, never seen it do that. For mine it was just plug and play right out of the box. I didn’t have to change anything or add drivers.
I was trying it on the provided extension cable, for convenience (the adaptor will not fit in directly with another USB device, no room) so I went and tried it directly, unplugging my keyboard and shoving the adaptor in and ssh in remotely to try. That seems to work. Mayhaps the cable was funky. A little inconvenient though.
Well that didn’t last. It worked for all of 29 seconds then stopped working again. At least I now know that if it’s going to work there’s a little light on it, which I’d never seen before (or since).
A powered hub didn’t help. I’ve come to the conclusion my adaptor is dodgy. Thanks for the advice though.
The Raspberry Pi seems to be very touchy when it comes to input power. I tried three different power adapters before I found one that allowed it to run stable with all the peripherals attached. I wish the Pi came with it’s own AC power supply…
On second thought, it might be your power adapter. It may not be supplying enough power to run the adapter. I think mines is 2.1 Amp. If it is providing only like 750ma it may not be enough to power the USB adapter.
Seems that may well be it. I’ll consider a powered USB extension.
Very interesting article, I need to get myself a raspberry :).