In my previous post I briefly discussed what PwnPi is, and what the requirements are to run it. In this article we will actually learn how to install PwnPi on a Raspberry Pi board, creating a $35 pentesting platform!
Most posts I have seen cover installing Raspberry Pi disk images from a Linux view point. In this post we will cover installing PwnPi from a Windows perspective.
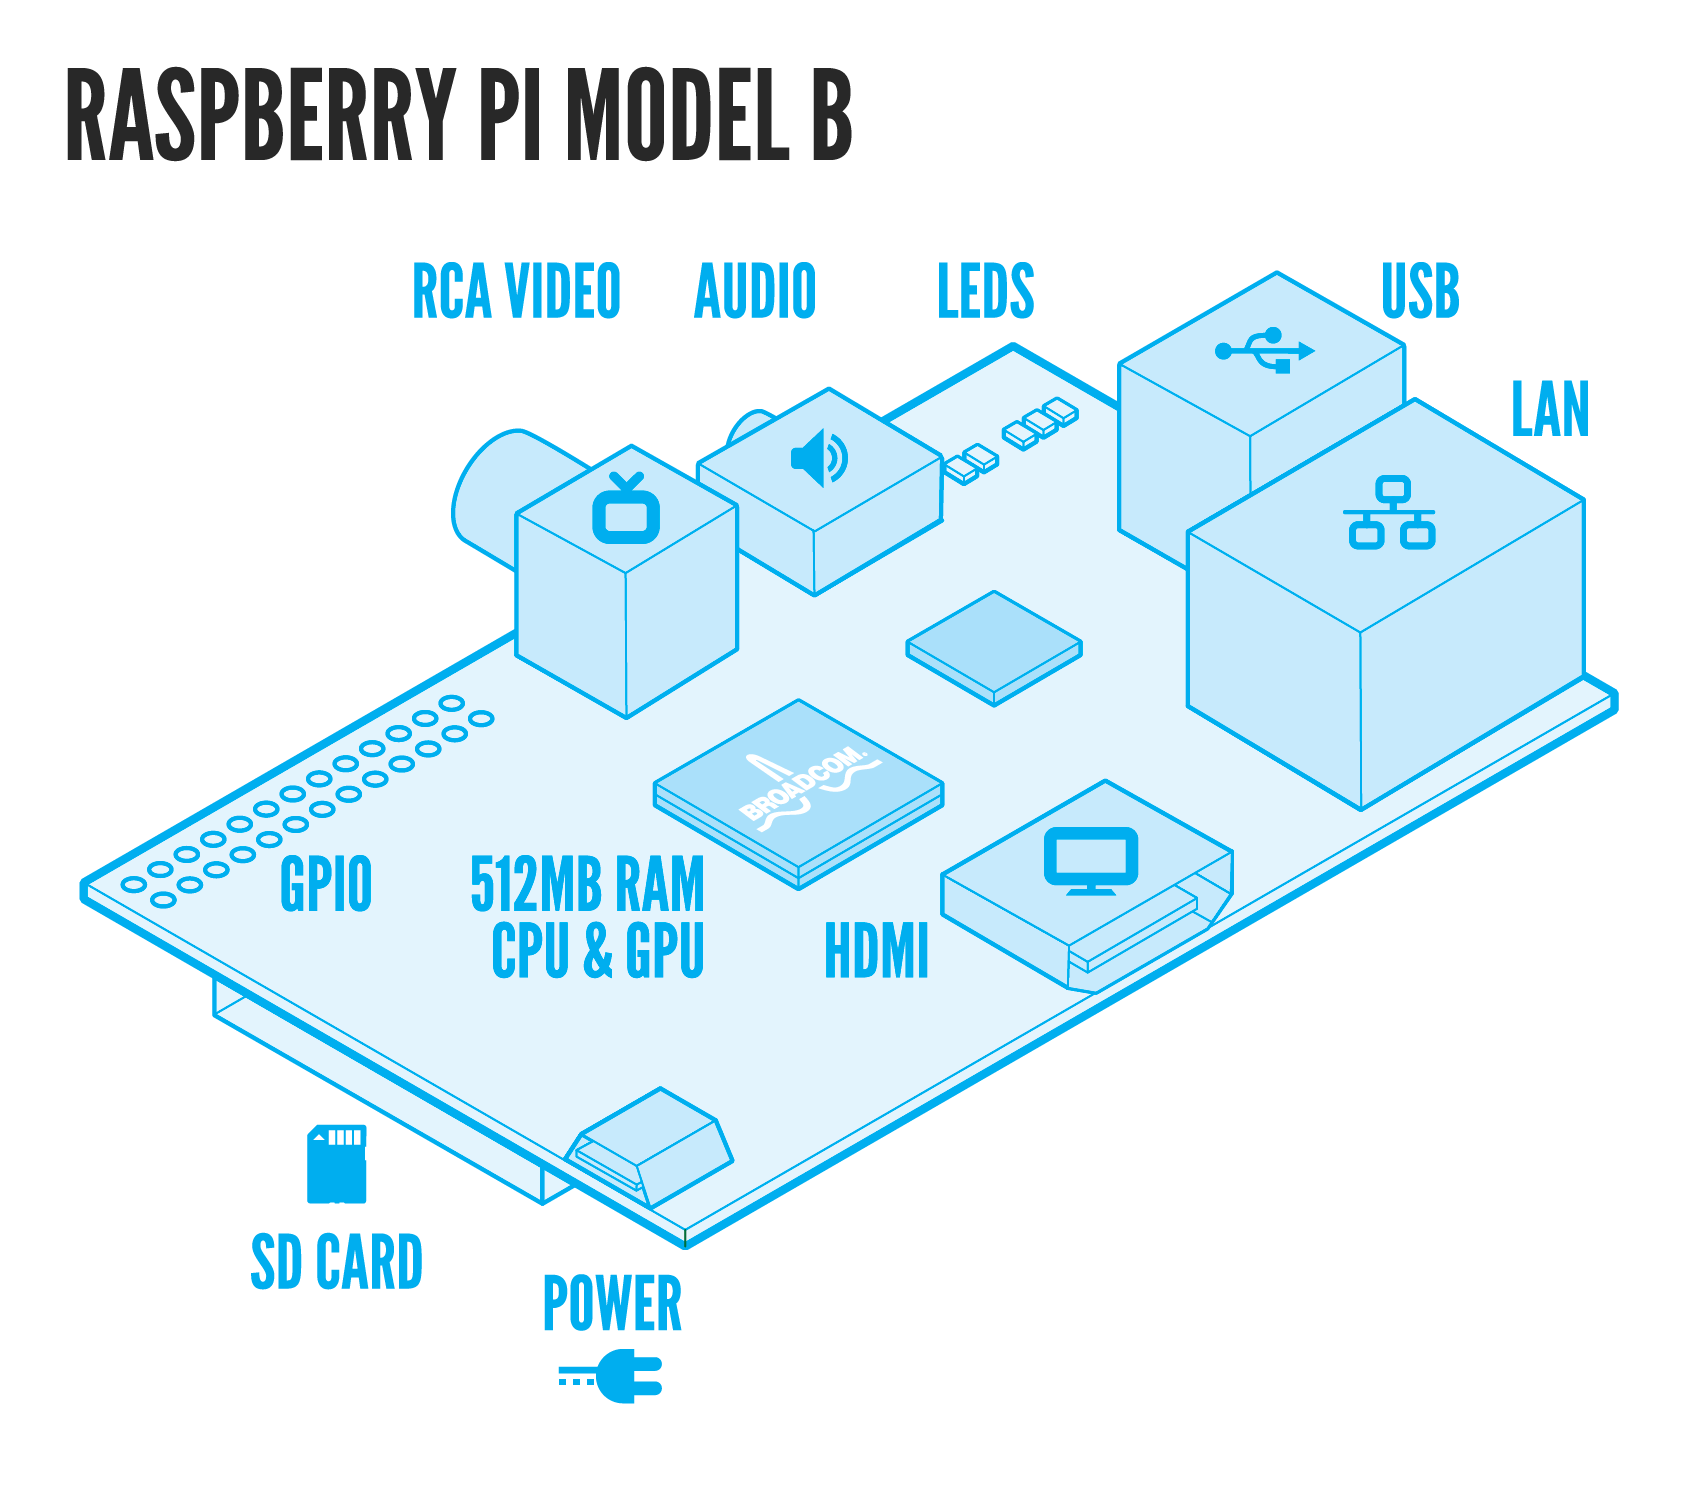
For this install we will need a Raspberry Pi (I used the 512MB model B), a power source for the Pi, an SD card 8GB or Larger (I used a 16GB) and a Windows System to install the PwnPi disk image onto the SD card. You will also need an Ethernet connection and optionally a keyboard and mouse.
(Check out the notes on these items in the intro article.)
Once we have everything together, it is time to install PwnPi.
1. Download the PwnPi image.
2. Install the image to your SD card – Disk Imager works great.
Just plug your SD card into your Windows Laptop, and run Disk Imager. Point the image file to your PwnPi image that you downloaded and point the device to the drive letter of your SD card:

Then just hit “Write”.
Disk Imager will write the PwnPi image to your SD card:

3. Now eject the SD card from your windows laptop and insert it into the SD card slot on your Raspberry Pi. Connect your video, Ethernet cable, and keyboard and mouse. (See connection chart at the top of the post)
4. Connect power to the Raspberry Pi and in a few seconds it will boot up into PwnPi.
That is it! You know have a Raspberry Pi Pentesting platform!
Connecting to the Raspberry Pi remotely from a Windows system using SSH
Now you can run commands from the command prompt, or if you want to run the Raspberry Pi headless (without monitor or keyboard). You can connect to the Pi from a Windows system remotely using SSH!
To Do so:
1. Download Putty for Windows
2. Run Putty and put in the IP address for your PwnPi. You can get this by typing “ifconfig” if you have a keyboard attached or by checking the address given to it by your router if you are running PwnPi headless.
My IP address was 192.168.1.101 in this case. Also, make sure port 22 is entered and select SSH as shown below:

Then just hit “Open”.
You will be asked asked to log into the Raspberry Pi. If this is the first time, just use the PwnPi default credentials:
Username: root
Password: toor

That’s it!
Now you can run any of the commands you want on your Raspberry Pi remotely from your Windows System.
Here is a sample nmap command:

We now have a $35 pentesting platform!
We will take a closer look at other things we can do with PwnPi in future articles.
Enjoy!

